Yeast Bread Recipe – Soft, Fluffy Homemade Bread
There’s something incredibly comforting about the aroma of freshly baked bread filling your kitchen. This classic yeast bread recipe is one of those timeless recipes every home baker should have in their collection. With its golden crust, soft interior, and rich homemade flavor, this bread delivers bakery-quality results using simple pantry ingredients.
Whether you’re making sandwiches, serving it alongside soups and stews, or simply enjoying a warm slice with butter, homemade yeast bread offers unmatched flavor and texture. Unlike quick breads, yeast bread develops a deeper taste and airy crumb through fermentation, creating the perfect balance of chewiness and softness.
If you’ve been intimidated by baking with yeast, don’t worry. This beginner-friendly recipe walks you through every step, from activating the yeast to achieving the perfect rise and beautiful golden crust. Along the way, you’ll learn helpful baking techniques that ensure consistent results every time.
This versatile bread recipe can also be adapted for dairy-free, vegan, whole wheat, and artisan-style loaves, making it suitable for various dietary preferences and occasions. Once you taste homemade bread straight from the oven, you may never want store-bought bread again.
Quick Recipe Overview
| Recipe Detail | Information |
|---|---|
| Recipe Name | Yeast Bread Recipe |
| Cuisine | American / European |
| Course | Bread |
| Prep Time | 20 Minutes |
| Cook Time | 35 Minutes |
| Rising Time | 1 Hour 30 Minutes |
| Total Time | 2 Hours |
| Servings | 12 Slices |
| Calories | Approximately 180 Per Slice |
| Difficulty Level | Beginner to Intermediate |
Why You’ll Love This Recipe
- Produces a soft, fluffy interior with a perfectly golden crust.
- Made with simple pantry staples.
- Ideal for beginner bread bakers.
- Perfect for sandwiches, toast, and dinner sides.
- Freezer-friendly for meal prep.
- Customizable with herbs, cheese, seeds, or whole grains.
- Delivers bakery-style results at a fraction of the cost.
Ingredients
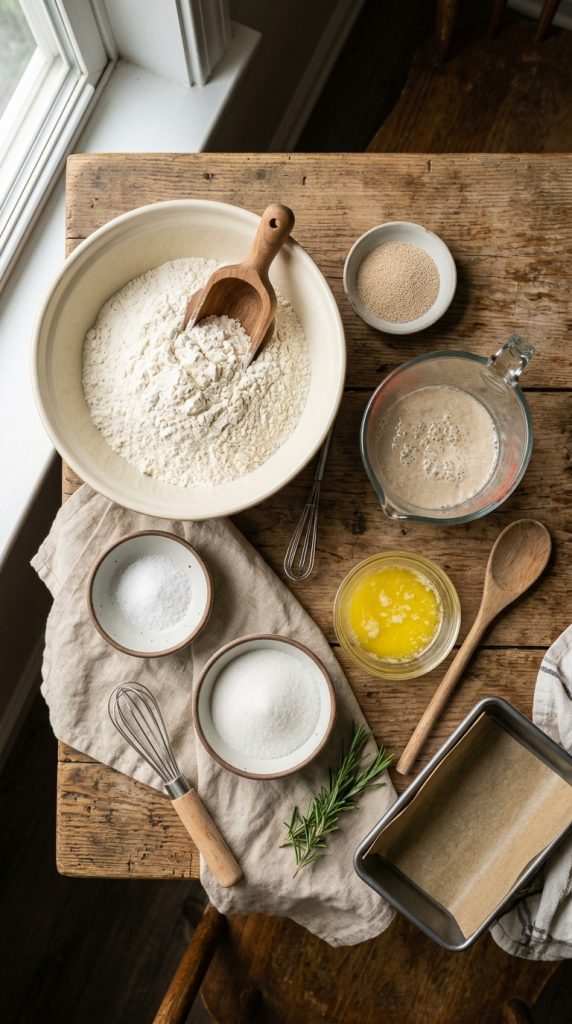
Ingredients You’ll Need
- 4 cups (500g) bread flour
- 2¼ teaspoons active dry yeast (1 packet)
- 1½ cups warm water (110°F/43°C)
- 2 tablespoons granulated sugar
- 2 tablespoons unsalted butter, melted
- 1½ teaspoons salt
- 1 tablespoon olive oil (for bowl)
Optional Add-Ins
- 2 tablespoons honey
- 1 tablespoon dried rosemary
- 1 teaspoon garlic powder
- ½ cup shredded cheddar cheese
- 2 tablespoons mixed seeds
- ¼ cup oats for topping
Ingredient Substitutions
- Use instant yeast instead of active dry yeast.
- Replace butter with olive oil for a dairy-free version.
- Substitute half the bread flour with whole wheat flour.
- Honey can replace sugar for a richer flavor.
- Gluten-free bread flour blend may be used with adjustments.
Equipment Needed
- Large mixing bowl
- Measuring cups and spoons
- Stand mixer with dough hook (optional)
- Wooden spoon
- Dough scraper
- Loaf pan (9×5-inch)
- Kitchen towel or plastic wrap
- Cooling rack
- Instant-read thermometer (optional)
Alternative: If you don’t own a stand mixer, kneading by hand works beautifully.
How To Make Yeast Bread Recipe
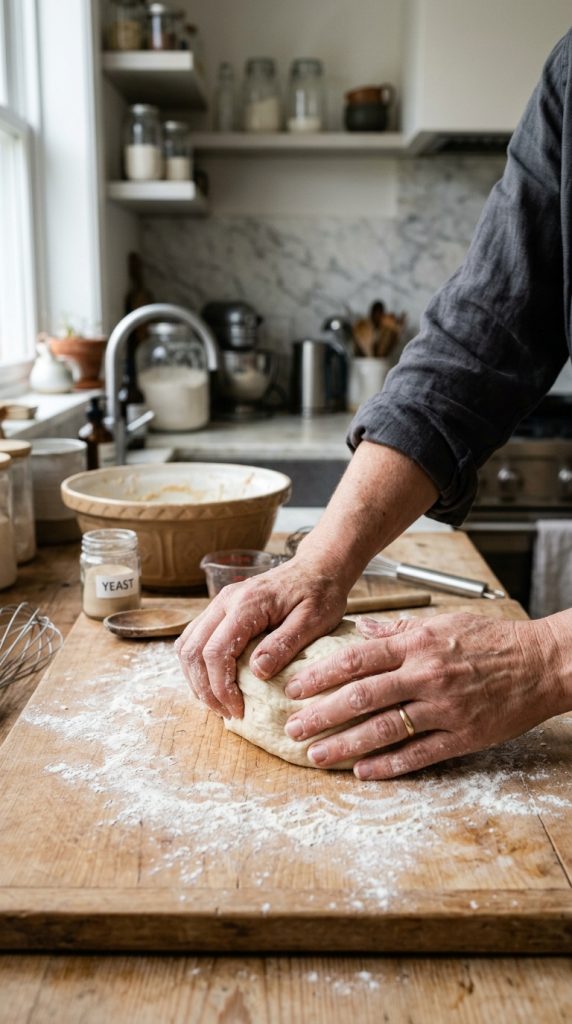
Step 1: Activate the Yeast
Pour the warm water into a large mixing bowl. Add sugar and yeast, then gently stir.
Let the mixture sit for 5–10 minutes until it becomes foamy and fragrant. The foam indicates that the yeast is alive and ready to help the dough rise.
Tip: If no foam develops, your yeast may be expired or the water temperature may be incorrect.
Step 2: Add Wet Ingredients
Add melted butter to the yeast mixture and stir until combined.
The mixture should smell slightly sweet and yeasty, a good sign that fermentation has begun.
Step 3: Mix the Dough
Add salt and gradually mix in the flour, one cup at a time.
Continue stirring until a shaggy dough forms. At this stage, the dough will appear rough and somewhat sticky.
Avoid adding too much flour too quickly. A slightly sticky dough produces softer bread.
Step 4: Knead the Dough
Transfer the dough to a lightly floured surface.
Knead for 8–10 minutes until the dough becomes smooth, elastic, and supple.
You’ll notice the dough transforming from rough and sticky into a silky ball that springs back when gently pressed.
Sensory Cue: Properly kneaded dough feels soft and stretchy rather than dense.
Step 5: First Rise
Lightly oil a large bowl.
Place the dough inside and turn it once to coat.
Cover with a kitchen towel and allow it to rise in a warm location for 60–90 minutes.
The dough should double in size and develop a light, airy appearance.
Step 6: Shape the Loaf
Punch down the dough gently to release excess gas.
Shape it into a loaf by folding the edges inward and rolling tightly.
Place the dough into a greased loaf pan.
The surface should appear smooth and slightly taut.
Step 7: Second Rise
Cover loosely and let rise again for 30–45 minutes.
The dough should rise about one inch above the edge of the pan.
This second rise contributes significantly to the bread’s fluffy texture.
Step 8: Bake
Preheat the oven to 375°F (190°C).
Bake for 28–32 minutes until the loaf develops a rich golden-brown crust.
The bread should sound hollow when tapped on the bottom.
For even greater accuracy, the internal temperature should reach approximately 190°F–200°F.
Step 9: Cool Properly
Remove the bread from the pan immediately.
Allow it to cool on a wire rack for at least 30 minutes.
The aroma will be irresistible, but cooling helps the crumb set properly and prevents a gummy texture.
Expert Cooking Tips
Use Bread Flour
Bread flour contains more protein, producing better gluten development and a chewier texture.
Measure Accurately
Too much flour can result in dense bread. Weigh ingredients whenever possible.
Create a Warm Proofing Environment
Place dough in a slightly warm oven with the light on to encourage consistent rising.
Add Steam
Placing a small pan of hot water in the oven can help create a thinner, crispier crust.
Brush with Butter
For a softer crust, brush the loaf with melted butter immediately after baking.
Common Mistakes To Avoid
Using Water That’s Too Hot
Water above 120°F can kill yeast and prevent rising.
Adding Excess Flour
Over-floured dough often produces dry, dense bread.
Skipping Kneading
Proper kneading develops gluten structure and creates an airy crumb.
Underproofing
Bread that hasn’t risen enough tends to be dense and heavy.
Overproofing
Dough that rises too long may collapse during baking.
Slicing Too Early
Fresh bread needs time to cool and set before slicing.
Health Benefits
Homemade yeast bread offers several nutritional advantages over many commercially produced breads.
Protein Benefits
Bread flour contributes protein that helps support muscle maintenance and satiety.
Fiber Content
Using whole wheat flour increases dietary fiber, promoting digestive health.
Vitamins and Minerals
Yeast contains B vitamins including:
- Thiamin
- Riboflavin
- Niacin
- Folate
The flour also contributes iron and magnesium.
Healthy Fats
Olive oil and butter provide fats that enhance flavor and texture while contributing energy.
Antioxidants
Whole grain versions contain antioxidants found in wheat bran and germ.
Diet-Friendly Options
- Vegetarian
- Dairy-Free (with substitutions)
- Vegan (with substitutions)
- Whole Grain
- High-Fiber
- Reduced Sugar
Variations
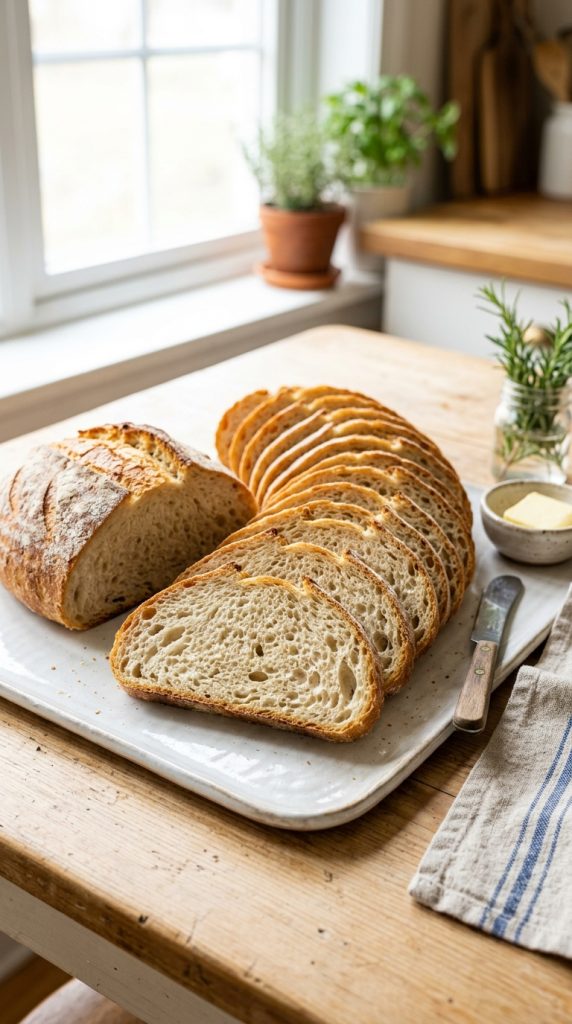
Vegan Version
Replace butter with olive oil or vegan butter.
Gluten-Free Version
Use a high-quality gluten-free bread flour blend formulated for yeast baking.
Low-Carb Version
Use almond flour-based yeast bread recipes specifically designed for low-carb diets.
Spicy Version
Add:
- Jalapeños
- Crushed red pepper flakes
- Pepper jack cheese
Sweet Version
Incorporate:
- Cinnamon
- Raisins
- Honey
- Brown sugar
Smoky Version
Add smoked paprika, smoked cheddar, or roasted garlic for a deeper flavor profile.
What To Serve With Yeast Bread Recipe
Side Dishes
- Tomato soup
- Beef stew
- Chicken noodle soup
- Garden salad
Sauces
- Garlic butter
- Herb-infused olive oil
- Homemade marinara
- Whipped honey butter
Drinks
- Coffee
- Tea
- Hot chocolate
- Fresh lemonade
Desserts
- Apple pie
- Bread pudding
- Chocolate cake
- Fruit cobbler
Holiday Pairings
Perfect alongside Thanksgiving turkey, Christmas ham, or Easter dinner.
Party Serving Ideas
Serve sliced with dipping oils, charcuterie boards, and artisan cheese platters.
Storage Instructions
Refrigerator Storage
Store in an airtight container for up to 5 days.
Freezer Storage
Wrap tightly and freeze for up to 3 months.
Reheating Instructions
Warm slices in a toaster or oven at 300°F for 5–7 minutes.
Meal Prep Tips
Bake multiple loaves and freeze extras for future meals.
Nutritional Information
| Nutrient | Amount Per Slice |
| Calories | 180 |
| Protein | 5g |
| Carbohydrates | 34g |
| Fat | 2.5g |
| Fiber | 1.5g |
Nutrition values are estimates and may vary depending on ingredients used.
Frequently Asked Questions
Why didn’t my yeast bread rise?
Expired yeast, water that’s too hot, or a cold proofing environment are the most common causes.
Can I use all-purpose flour instead of bread flour?
Yes, although bread flour generally produces better structure and chew.
How do I know when yeast is activated?
It should become foamy and bubbly within 5–10 minutes.
Can I make this bread without a stand mixer?
Absolutely. Hand kneading works perfectly.
Why is my homemade bread dense?
Dense bread usually results from insufficient kneading, underproofing, or excess flour.
Can I freeze yeast bread?
Yes. Properly wrapped bread freezes well for up to 3 months.
How long does homemade bread stay fresh?
Typically 3–5 days when stored properly.
Recipe Summary
| Category | Details |
| Prep Time | 20 Minutes |
| Cook Time | 35 Minutes |
| Total Time | 2 Hours |
| Servings | 12 Slices |
| Main Flavor Notes | Buttery, Mildly Sweet, Fresh Bread Aroma |
| Best Occasions | Family Meals, Sandwiches, Holidays, Meal Prep |
Conclusion
A homemade yeast bread recipe is one of the most rewarding baking projects you can tackle in your kitchen. With simple ingredients, straightforward techniques, and a little patience, you’ll be rewarded with a loaf that’s soft, fluffy, aromatic, and far superior to most store-bought alternatives.
The rich aroma of fresh bread, the golden crust, and the tender crumb make every slice feel special. Whether you’re serving it alongside dinner, transforming it into sandwiches, or enjoying it warm with butter, this versatile bread recipe fits nearly any occasion.
Even better, it’s highly customizable with whole grains, herbs, seeds, cheese, or sweet additions, allowing you to create your perfect loaf. Once you’ve mastered this recipe, you’ll have a reliable homemade bread foundation you can use for years to come.
Give this yeast bread recipe a try, share it with family and friends, and don’t forget to leave a comment about your baking experience.
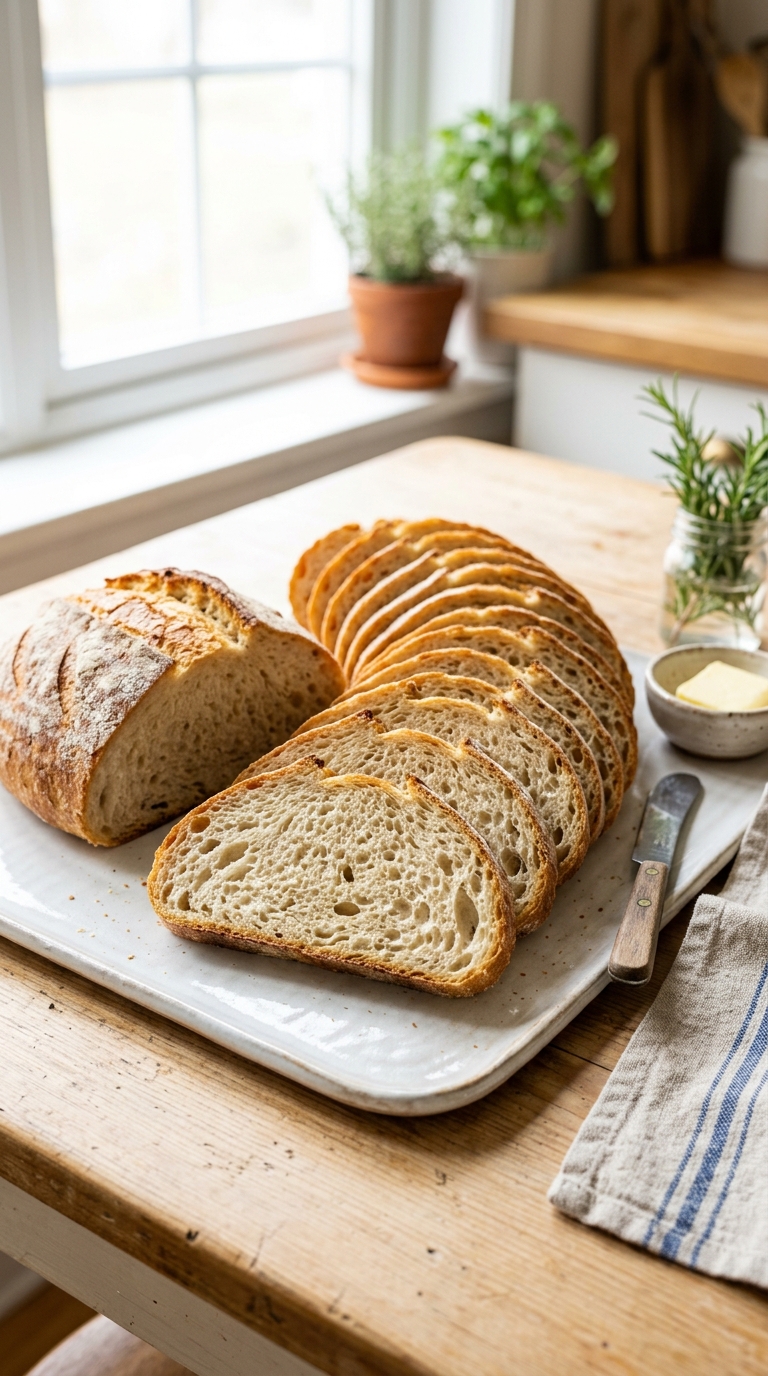
Yeast Bread Recipes
Ingredients
Equipment
Method
- Step 1: Activate the Yeast
- Pour the warm water into a large mixing bowl. Add sugar and yeast, then gently stir.
- Let the mixture sit for 5–10 minutes until it becomes foamy and fragrant. The foam indicates that the yeast is alive and ready to help the dough rise.
- Tip: If no foam develops, your yeast may be expired or the water temperature may be incorrect.
- Step 2: Add Wet Ingredients
- Add melted butter to the yeast mixture and stir until combined.
- The mixture should smell slightly sweet and yeasty, a good sign that fermentation has begun.
- Step 3: Mix the Dough
- Add salt and gradually mix in the flour, one cup at a time.
- Continue stirring until a shaggy dough forms. At this stage, the dough will appear rough and somewhat sticky.
- Avoid adding too much flour too quickly. A slightly sticky dough produces softer bread.
- Step 4: Knead the Dough
- Transfer the dough to a lightly floured surface.
- Knead for 8–10 minutes until the dough becomes smooth, elastic, and supple.
- You’ll notice the dough transforming from rough and sticky into a silky ball that springs back when gently pressed.
- Sensory Cue: Properly kneaded dough feels soft and stretchy rather than dense.
- Step 5: First Rise
- Lightly oil a large bowl.
- Place the dough inside and turn it once to coat.
- Cover with a kitchen towel and allow it to rise in a warm location for 60–90 minutes.
- The dough should double in size and develop a light, airy appearance.
- Step 6: Shape the Loaf
- Punch down the dough gently to release excess gas.
- Shape it into a loaf by folding the edges inward and rolling tightly.
- Place the dough into a greased loaf pan.
- The surface should appear smooth and slightly taut.
- Step 7: Second Rise
- Cover loosely and let rise again for 30–45 minutes.
- The dough should rise about one inch above the edge of the pan.
- This second rise contributes significantly to the bread’s fluffy texture.
- Step 8: Bake
- Preheat the oven to 375°F (190°C).
- Bake for 28–32 minutes until the loaf develops a rich golden-brown crust.
- The bread should sound hollow when tapped on the bottom.
- For even greater accuracy, the internal temperature should reach approximately 190°F–200°F.
- Step 9: Cool Properly
- Remove the bread from the pan immediately.
- Allow it to cool on a wire rack for at least 30 minutes.
- The aroma will be irresistible, but cooling helps the crumb set properly and prevents a gummy texture.