Easy Flaky Pie Crust Recipe (No-Fail, Buttery & Crisp)
Intro
A great pie crust is 90% technique and 10% recipe — which is good news, because the techniques are simple. Cold fat. Pea-sized chunks. Ice water. Do not overwork it. That is genuinely most of what separates a shattering, flaky crust from a tough, leathery one.
This recipe adds two insurance policies. First, it uses half butter and half shortening: butter brings the rich flavor, shortening brings the tenderness and flakiness that all-butter crusts sometimes lack. Second, a tablespoon of cold vinegar — the old-fashioned “foolproof” trick. Vinegar slightly inhibits gluten formation, so even if you handle the dough a little more than ideal, it stays tender instead of turning tough.
It makes two 9-inch crusts (a bottom and a top, or two single-crust pies), comes together in 15 minutes of active time, and the dough keeps in the fridge for 2 days or the freezer for 3 months. If pie crust has ever intimidated you, this is the recipe that changes that.
Prep time: 15 mins | Chill time: 30 mins | Total time: 45 mins | Makes: 2 (9-inch) crusts | Calories: 180 per 1/8 crust
Why You’ll Love This Pie Crust Recipe
- Flaky AND flavorful: Half butter, half shortening gives you butter’s taste with shortening’s shattering tenderness — the best of both worlds.
- The vinegar insurance policy: A tablespoon of cold vinegar keeps the dough tender even if you overwork it slightly. True no-fail territory.
- 15 minutes of active time: Mix, chill, roll. No food processor required (though you can use one).
- Make-ahead friendly: Dough keeps 2 days in the fridge or 3 months in the freezer — future-you will be grateful at Thanksgiving.
- Sweet or savory: Keep the sugar for fruit and custard pies, omit it for quiche and pot pie.
Ingredients
- 2 1/2 cups all-purpose flour, spooned and leveled (do not scoop from the bag — it packs in too much flour)
- 1 tsp fine salt
- 1 tbsp granulated sugar (omit for savory pies like quiche or chicken pot pie)
- 1/2 cup (1 stick) cold unsalted butter, cut into 1/2-inch cubes — keep it in the fridge until the last second
- 1/2 cup cold vegetable shortening, cut into small pieces
- 1 tbsp apple cider vinegar or distilled white vinegar, cold
- 6–8 tbsp ice water (fill a measuring cup with water and ice cubes)
Equipment Needed
- Large mixing bowl
- Pastry blender (or two butter knives, or your fingertips)
- Rolling pin
- 9-inch pie plate
- Plastic wrap
- For blind-baking: parchment paper + pie weights or dried beans
How To Make
- Combine the dry ingredients. Whisk the flour, salt, and sugar in a large bowl until evenly mixed.
- Cut in the cold fats. Scatter the cold butter cubes and shortening pieces over the flour. Using a pastry blender (or two knives, or your fingertips), cut the fats into the flour until the mixture looks like coarse crumbs with plenty of pea-sized chunks of butter still visible. Those visible chunks are the whole game — they are what melt into flaky layers in the oven. Work quickly so the fats stay cold.
- Add the liquids. Drizzle the cold vinegar and 6 tablespoons of ice water over the mixture. Toss gently with a fork, just until the dough starts to hold together when you squeeze a handful — it will still look crumbly and shaggy in the bowl, and that is correct. If it will not hold at all, add more ice water 1 tablespoon at a time. Stop the moment it holds; too much water makes tough crust.
- Shape and chill. Turn the dough onto a lightly floured surface and divide it in half. Gently pat each half into a 1-inch-thick disk (do not knead). Wrap each disk tightly in plastic wrap and refrigerate at least 30 minutes, or up to 2 days. Chilling firms up the fats and relaxes the gluten — skipping it is how crusts shrink in the oven.
- Roll it out. On a lightly floured surface, roll one chilled disk into a 12-inch circle about 1/8 inch thick, starting from the center and rolling outward, rotating the dough a quarter-turn every few rolls to keep it from sticking. If the edges crack, pinch them back together — cold dough is forgiving.
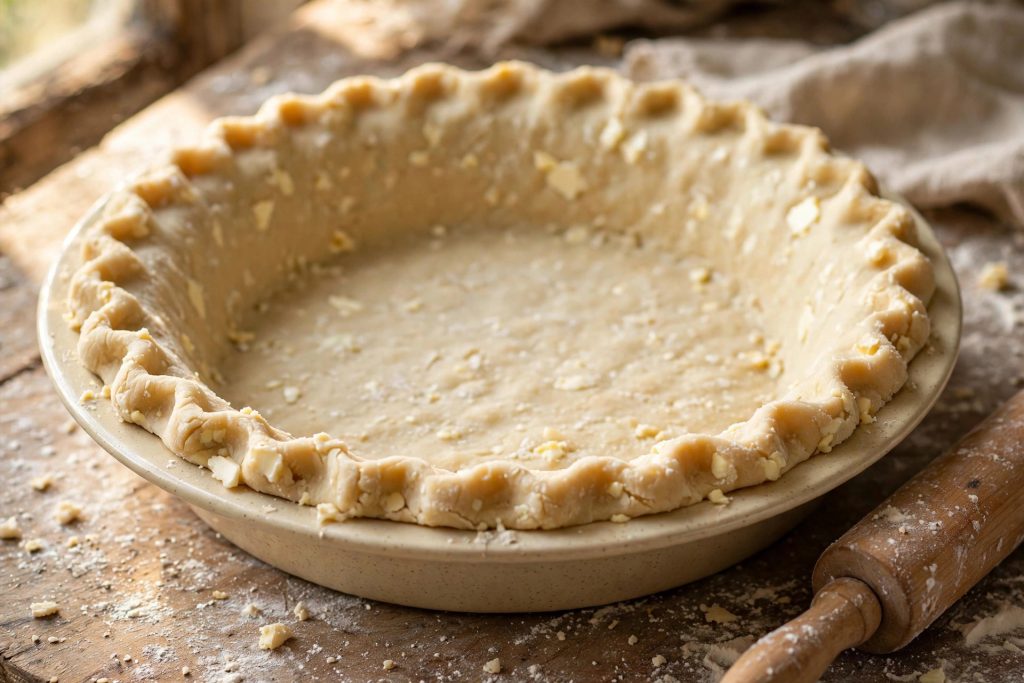
- Line the pie plate. Loosely roll the dough around your rolling pin, then unroll it over a 9-inch pie plate. Ease it into the bottom and sides without stretching or pulling (stretched dough shrinks back). Trim the overhang to 1 inch all around, fold it under itself, and crimp the edge with your fingers or a fork.
- Fill or blind-bake. For a filled pie (apple, pumpkin, pecan), add your filling, add the top crust if using, and bake according to your pie recipe. For a pre-baked shell (cream pies, no-bake pies), follow the blind-baking instructions below.
The Three Secrets to Maximum Flakiness
Secret 1: Visible pea-sized butter chunks
Flakiness is literally layers of dough separated by melted fat. If you cut the butter in until it disappears into the flour, you get a mealy, cookie-like crust. Those distinct little butter lumps flatten in the oven into thin layers – that is the shatter. When in doubt, leave the chunks bigger.
Secret 2: Everything stays cold
Cold butter, cold shortening, ice water, even a cool kitchen if you can manage it. Warm fat melts into the flour instead of staying in distinct pieces, and you lose the layers. If the dough ever feels soft or greasy while you are working, stop and chill it for 15 minutes before continuing.
Secret 3: Handle it as little as possible
Every squeeze develops gluten, and gluten makes crust tough instead of tender. Mix just until it holds, pat (do not knead) into disks, and roll with confident, even strokes rather than fussing. The vinegar helps here — it is your safety net — but a light hand is still the main ingredient.
How to Blind-Bake (for Cream Pies & No-Bake Fillings)
- Preheat the oven to 425°F. Prick the bottom and sides of the lined crust generously with a fork — this stops big air bubbles.
- Line the crust with parchment paper and fill with pie weights or dried beans, pushing them into the corners so the sides do not slump.
- Bake 15 minutes, then carefully lift out the parchment and weights. The crust will look pale and set — that is right.
- Bake 8–10 minutes more until golden brown all over. Cool completely on a wire rack before filling.
Troubleshooting
Crust shrank in the oven
The dough was stretched when placed in the plate, or it was not chilled long enough. Ease (never stretch) the dough in, and chill the shaped crust 15 minutes before baking.
Soggy bottom
Underbaked, or a very wet filling. Blind-bake the bottom crust for 10 minutes before adding wet fillings, and bake pies on the lowest oven rack so the bottom gets direct heat.
Tough, hard crust
Too much water, or overworked dough. Add water sparingly and handle minimally — the vinegar trick helps, but it cannot save a kneaded dough.
Edges browning too fast
Cover the rim with strips of foil or a pie shield for the last half of baking.
Dough cracking when rolling
It is too cold. Let the disk sit at room temperature 5–10 minutes, then roll. Small cracks can simply be pinched closed.
Tips & Variations
All-butter version
Replace the shortening with an equal amount of butter for maximum flavor. It will be slightly less tender but richer — chill the shaped crust well before baking.
Food processor method
Pulse the flour, salt, sugar, and cold fats until pea-sized crumbs form, then drizzle in the vinegar and ice water while pulsing just until the dough holds. Faster, and your warm hands never touch it.
Herb savory crust
Omit the sugar and add 1 tbsp chopped fresh thyme or rosemary with the flour — wonderful for quiche and chicken pot pie.
Freezer stash
Wrap disks in plastic, then foil, and freeze up to 3 months. Thaw overnight in the fridge before rolling. You can also freeze a fully shaped, unbaked crust in its pie plate — bake from frozen, adding 5 minutes.
Storage
Unbaked dough disks keep 2 days in the refrigerator or 3 months in the freezer (thaw overnight in the fridge). A blind-baked shell keeps at room temperature, loosely covered, for up to 2 days — recrisp 5 minutes in a 350°F oven if needed. Baked pies follow their filling’s storage rules.
FAQ
Why did my pie crust come out tough instead of flaky?
Almost always one of three things: too much water, overmixing, or warm fat. Use the minimum water needed for the dough to hold, stop mixing early (shaggy is fine), and keep everything cold. The vinegar in this recipe gives you extra margin for error.
Can I make pie crust without a pastry blender?
Yes. Two butter knives in a crisscross cutting motion work, and your fingertips work too — just work fast so your body heat does not melt the butter. A food processor is the easiest alternative.
Do I really need both butter and shortening?
You do not — but each brings something. Butter brings flavor; shortening brings tenderness and flakiness. All-butter is delicious but a touch firmer; all-shortening is supremely flaky but blander. The half-and-half split is the sweet spot most bakers land on.
Why do you add vinegar to pie crust?
Acid slightly inhibits gluten development, which keeps the crust tender even if you handle the dough more than the ideal. You cannot taste it in the baked crust — it is purely structural insurance. Vodka does the same thing (it adds moisture without developing gluten), but vinegar is cheaper and always on hand.
Can I use this for a double-crust pie?
That is exactly what the two disks are for — one for the bottom, one for the top. Roll out the second disk the same way, lay it over the filling, trim and crimp the two layers together, cut vents in the top, and bake per your pie recipe.
Related:
Easy Classic Pumpkin Pie Recipe (Creamy, Foolproof & Perfect for Thanksgiving)
Easy Mexican Rice Recipe (Fluffy, Restaurant-Style)
The Best Tuna Salad Recipe (Creamy, Crunchy & Classic)
Easy Stir Fry Recipe (20-Minute Formula for Any Protein + Veggie)
Easy Flaky Pie Crust
Ingredients
Method
- In a large bowl, whisk together the flour, salt, and sugar until evenly combined.
- Scatter the cold butter cubes and shortening pieces over the flour. Using a pastry blender (or two knives, or your fingertips), cut the fats into the flour until you have pea-sized crumbs with a few larger, almond-sized pieces — those visible chunks are what make it flaky.
- Drizzle the cold vinegar and 6 tablespoons of the ice water over the mixture. Toss gently with a fork, then squeeze a handful — if it holds together, it is ready. If it crumbles apart, add more ice water 1 tablespoon at a time.
- Turn the dough onto a lightly floured surface and divide it in half. Gently pat each half into a 1-inch-thick disk (do not knead), wrap tightly in plastic wrap, and refrigerate at least 30 minutes or up to 2 days.
- On a lightly floured surface, roll one chilled disk from the center outward into a 12-inch circle about 1/8 inch thick, turning the dough a quarter turn every few rolls to prevent sticking.
- Loosely roll the dough around your rolling pin, then unroll it over a 9-inch pie plate. Ease (do not stretch) it into the corners, leaving a 1-inch overhang. Trim the overhang, then fold the edge under and crimp as desired.
- Fill and bake according to your pie recipe, or blind-bake: line with parchment, fill with pie weights, and bake at 425°F for 15 minutes; remove weights and bake 8–10 minutes more until golden.