

Quick Easy Mug Cake Recipe Using Cake Mix
There is a specific kind of magic that happens when you realize a gourmet-level dessert is only sixty seconds away. We have all been there: it is late at night, the cravings hit, but the thought of preheating an oven, greasing pans, and waiting thirty minutes for a full-sized cake feels like an impossible task. Enter the cake mix mug cake—a revolutionary approach to baking that prioritizes speed without sacrificing that tender, moist crumb we all adore. This recipe is the ultimate solution for portion-controlled indulgence, allowing you to enjoy a warm, fluffy treat using just two shelf-stable ingredients.
Whether you are a busy student looking for a quick study snack, a parent needing a fast reward for the kids, or simply someone who appreciates the efficiency of modern kitchen hacks, this method is a game-changer. By utilizing the pre-balanced chemistry of a boxed cake mix, we skip the measuring of flour, baking powder, and salt. The result is a consistent, reliable dessert that mimics the texture of a traditional oven-baked cake but fits perfectly in the palm of your hand. In this guide, we will explore the nuances of microwave baking, from choosing the right mug to mastering the timing for that elusive molten center.
| Feature | Details |
|---|---|
| Recipe Name | 2-Ingredient Cake Mix Mug Cake |
| Cuisine | American / Modern Fusion |
| Course | Dessert / Snack |
| Prep Time | 1 Minute |
| Cook Time | 1 Minute |
| Total Time | 2 Minutes |
| Servings | 1 Person |
| Calories | Approx. 210 kcal (varies by mix) |
| Difficulty Level | Beginner / Effortless |
Why You’ll Love This Recipe
There are countless reasons why the cake mix mug cake has become a viral sensation and a staple in modern kitchens. Here is why this recipe deserves a spot in your regular rotation:
- Instant Gratification: From start to finish, you are looking at less than three minutes of effort. It is the fastest way to satisfy a sugar craving.
- Minimal Cleanup: You mix the batter directly in the mug you eat from. No bowls, no beaters, and no messy countertops.
- Portion Control: Baking a whole cake often leads to leftovers that tempt you for days. This single-serve portion keeps indulgence sensible.
- Infinite Variety: Because you are using a base mix, you can swap flavors instantly. One day it’s Red Velvet, the next it’s Lemon or Spice cake.
- Budget-Friendly: A single box of cake mix can yield over a dozen mug cakes, making this an incredibly cost-effective dessert option.
- Kid-Friendly: This is a fantastic “entry-level” recipe for children to learn the basics of mixing and microwave safety.
Ingredients
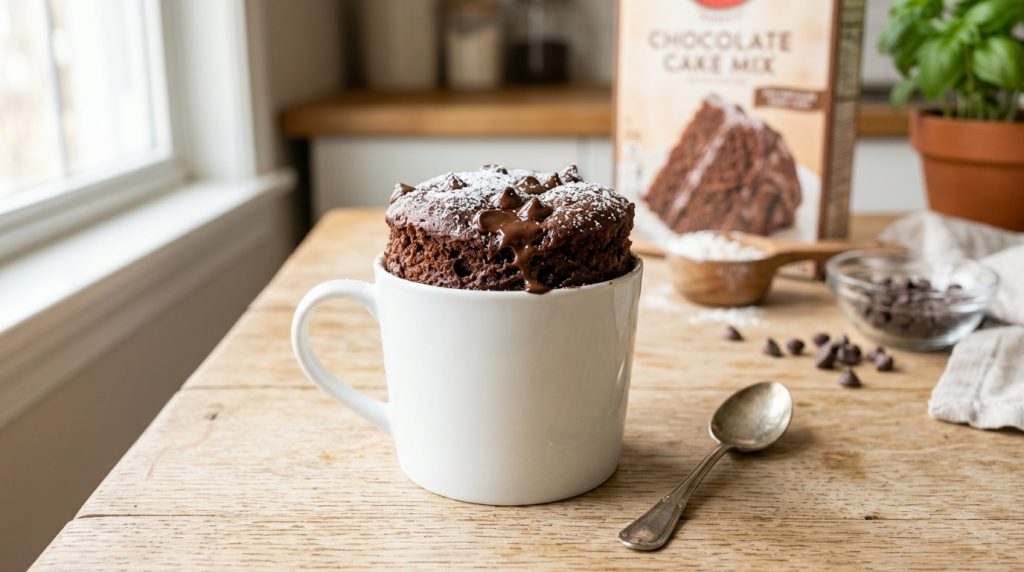
The beauty of this recipe lies in its simplicity. You likely already have these items in your pantry.
Ingredients You’ll Need
- 6 Tablespoons Dry Cake Mix: Any brand (Betty Crocker, Duncan Hines, or Pillsbury) and any flavor (Chocolate, Vanilla, Funfetti, etc.).
- 2 to 3 Tablespoons Liquid: Water is the standard, but milk adds a richer fat content for a more decadent mouthfeel.
Optional Add-Ins
To take your mug cake from “basic” to “bakery-style,” consider these enhancers:
- Chocolate Chips: 1 tablespoon of semi-sweet or white chocolate chips for melty pockets.
- Sprinkles: For a “birthday cake” vibe, even if it isn’t your birthday.
- Nut Butters: A teaspoon of peanut butter or almond butter dropped in the center before cooking creates a lava-cake effect.
- Extracts: A drop of pure vanilla or almond extract deepens the aromatic profile.
- Fruit: A few fresh blueberries or a dollop of mashed banana for natural sweetness.
Ingredient Substitutions
- Liquid Swaps: Instead of water, try cold brew coffee (for chocolate cakes), orange juice (for vanilla or lemon cakes), or even applesauce for a denser, oil-free version.
- Egg Substitute: While this 2-ingredient version doesn’t require eggs, adding 1 tablespoon of whisked egg or 1 tablespoon of yogurt can make the cake even fluffier and more “sponge-like.”
- Gluten-Free: Simply use a gluten-free boxed cake mix; the ratio remains exactly the same.
Equipment Needed
You don’t need a high-end kitchen to pull this off. However, the right tools ensure the best texture.
- Microwave-Safe Mug: Choose a ceramic mug that holds at least 10 to 12 ounces. The cake will rise significantly during cooking, and a small mug will lead to an overflow.
- Measuring Spoons: Accuracy matters even in simple recipes. Use a standard tablespoon set.
- Small Whisk or Fork: A fork works perfectly to break up any clumps in the dry mix.
- Microwave: A standard 700W to 1200W microwave. (Note: Cooking times vary based on wattage).
How To Make a Cake Mix Mug Cake
Follow these steps for a perfect result every time. Pay close attention to the sensory cues to avoid overcooking.
Step 1: Choose and Prep Your Mug
Select a microwave-safe ceramic mug. While not strictly necessary, a light coating of non-stick cooking spray inside the mug can make the cake easier to eat and the mug easier to clean later.
Step 2: Measure the Dry Mix
Add 6 level tablespoons of your chosen cake mix into the mug. If you see large clumps in the powder, use your fork to press them against the side of the mug until the mixture is fine and aerated.
Step 3: Incorporate the Liquid
Add 2 tablespoons of your liquid (water or milk). Start stirring gently with your fork, reaching all the way to the “corners” at the bottom of the mug where dry pockets of flour like to hide. If the batter seems excessively thick or paste-like, add the third tablespoon of liquid. The consistency should be similar to thick pancake batter.
Step 4: Add Your Mix-ins
If you are using chocolate chips or sprinkles, fold them in now. If you want a “lava” center, drop a teaspoon of Nutella or peanut butter right into the middle of the batter—do not stir it in; let it sink naturally.
Step 5: The Microwave Phase
Place the mug in the center of the microwave. Set the timer for 60 seconds on high power.
- Visual Cue: Watch through the window. The cake will rise rapidly, sometimes even peeking over the rim of the mug. This is normal!
- Aroma: You should start smelling the sweet, baked aroma around the 45-second mark.
Step 6: The Doneness Test
Once the timer dings, the top of the cake should look set and slightly matte, not wet or shiny. If it still looks liquid on top, microwave in additional 10-second bursts. Be careful—overcooking by even 15 seconds can turn the texture from “cakey” to “rubbery.”
Step 7: The Rest Period (Crucial!)
Remove the mug carefully (it will be hot!). Let the cake sit for 1 to 2 minutes. During this time, the residual heat finishes cooking the very center, and the steam settles, which prevents that “spongy” or “tough” texture often associated with microwave baking.
Expert Cooking Tips
- Know Your Wattage: If you have a high-wattage microwave (1100W+), your cake might be done in 45-50 seconds. If it’s a lower wattage (700W), it may need 75-90 seconds.
- The “Toothpick” Rule: Just like a big cake, a toothpick inserted into the center should come out mostly clean, perhaps with a few moist crumbs.
- Sift if Necessary: If your cake mix has been sitting in the pantry for a while, it might be lumpy. Sifting the 6 tablespoons into the mug ensures a smoother batter.
- Don’t Overmix: Stir until just combined. Over-agitating the batter develops gluten, which can make the mug cake tough.
- Elevate the Toppings: A warm mug cake is the perfect vessel for a scoop of cold vanilla bean ice cream. The contrast of temperatures is elite.
Common Mistakes To Avoid
- Using a Mug That Is Too Small: This is the #1 cause of microwave messes. The batter should fill no more than half the mug before cooking.
- Overcooking: Microwave cakes continue to “set” as they cool. If you wait until it looks completely dry in the microwave, it will be hard as a rock by the time you eat it.
- Forgetting to Stir the Bottom: It is frustrating to get to the bottom of your dessert only to find a layer of dry, unmixed flour. Use a small whisk to ensure total incorporation.
- Using Old Mix: If your cake mix is years past its expiration date, the leavening agents (baking soda/powder) may have lost their potency, resulting in a flat, dense cake.
- Eating Too Fast: The center of a mug cake holds immense heat. Give it that 2-minute rest to avoid burning your tongue!
Health Benefits and Diet-Friendly Options
While a mug cake is traditionally a treat, you can certainly tweak the ingredients to align with specific nutritional goals.
- Portion Control: By limiting the dessert to one mug, you naturally prevent the “second slice” syndrome, helping manage overall caloric intake.
- Protein Boost: Swap the water for a high-protein milk or even a tablespoon of Greek yogurt. You can also mix in a teaspoon of collagen peptides without affecting the flavor.
- Fiber Content: Use a box mix that incorporates whole grains or add a teaspoon of ground flaxseed to the batter.
- Vegan Options: Most standard boxed cake mixes (like many “accidental vegan” varieties) are dairy-free. Use water or almond milk as your liquid to keep it 100% plant-based.
- Gluten-Free: Brands like King Arthur or Bob’s Red Mill offer excellent GF cake mixes that work perfectly with this 2-ingredient ratio.
- Low-Sugar: Look for “Zero Sugar” cake mixes now available from major brands. These use sugar alcohols or stevia to keep the glycemic index lower.
Variations
The “Double Chocolate” Version
Use chocolate cake mix and use cold coffee instead of water. The coffee intensifies the cocoa notes without making the cake taste like a latte. Add dark chocolate chunks for extra richness.
The “Birthday Party” Version
Use Funfetti or White cake mix. Add a drop of almond extract and extra rainbow sprinkles. Top with a swirl of canned frosting after it cools for 2 minutes.
The “Warm Spice” Version
Use Spice Cake mix or Carrot Cake mix. Use apple cider as your liquid. This creates a wonderful autumnal flavor profile that pairs perfectly with a dollop of whipped cream.
The “Lemon Zest” Version
Use Lemon cake mix and replace 1 tablespoon of water with fresh lemon juice. Add a tiny bit of lemon zest to the batter for a bright, citrusy punch.
The “Red Velvet” Version
Use Red Velvet mix and use milk as the liquid. Once cooked, poke a few holes in the top and pour over a teaspoon of heavy cream or melted cream cheese frosting.
What To Serve With Your Mug Cake
Side Dishes
While a mug cake is a standalone star, a side of fresh berries (raspberries or strawberries) adds a necessary acidity to cut through the sweetness.
Sauces
A drizzle of salted caramel, chocolate ganache, or even a simple berry coulis can elevate the presentation from “snack” to “plated dessert.”
Drinks
Pair your warm cake with a cold glass of milk, a hot espresso, or a glass of dessert wine like a late-harvest Riesling for a sophisticated evening treat.
Holiday Pairings
For the holidays, try a Gingerbread cake mix with a side of eggnog. For Valentine’s day, a Red Velvet mug cake with a glass of champagne is incredibly romantic and low-stress.
Storage Instructions
Refrigerator Storage
Mug cakes are best enjoyed immediately. However, if you cannot finish it, cover the mug with plastic wrap and store it in the fridge for up to 24 hours.
Freezer Storage
We do not recommend freezing a cooked mug cake, as the microwave-baked texture does not hold up well to the thawing process. Instead, pre-portion your dry mix into small baggies for “instant” future use.
Reheating Instructions
If you have refrigerated your cake, reheat it in the microwave for only 10-15 seconds. Any longer and it will become very tough.
Meal Prep Tips
You can “meal prep” your desserts! Measure out 6 tablespoons of cake mix into several small jars or containers. When the craving hits, just dump a jar into a mug, add liquid, and cook.
Nutritional Information
| Nutrient | Amount Per Serving |
|---|---|
| Calories | 210 kcal |
| Total Fat | 6g |
| Saturated Fat | 2g |
| Cholesterol | 0mg |
| Sodium | 280mg |
| Total Carbohydrates | 38g |
| Dietary Fiber | 1g |
| Sugars | 18g |
| Protein | 2g |
*Nutrition values are estimates and may vary depending on the specific brand of cake mix and liquid used.
FAQs
Can I make this without a microwave?
While the “mug cake” is designed for the microwave, you can bake this in a small oven-safe ramekin at 350°F (175°C) for about 12-15 minutes. However, it loses the “instant” benefit of the recipe.
Why is my mug cake rubbery?
Rubbery texture is usually caused by overcooking or using too much fat (like adding too much oil or butter). Stick to the 60-second rule and adjust in very small increments.
Can I use an egg in this recipe?
Yes! Adding one small egg (or half a large whisked egg) will make the cake much richer and more like a traditional cake. If you add an egg, you may need to reduce the other liquid by 1 tablespoon.
Is it safe to eat cake mix “raw”?
No, you should not eat the raw batter because the flour in the cake mix needs to be heat-treated to kill potential bacteria. Once microwaved, it is perfectly safe.
Can I use a paper cup instead of a mug?
As long as the paper cup is labeled “microwave safe,” you can. However, ceramic mugs distribute heat more evenly, leading to a better rise.
My cake overflowed, what happened?
Your mug was likely too small, or you added too much leavening (like extra baking powder). Always ensure the batter only fills half the mug.
Recipe Summary
| Category | Quick Facts |
|---|---|
| Prep Time | 1 Minute |
| Cook Time | 1 Minute |
| Total Time | 2 Minutes |
| Servings | 1 |
| Main Flavor Notes | Sweet, fluffy, customizable |
| Best Occasions | Late-night snacks, quick treats, kids’ activities |
Conclusion
The 2-ingredient cake mix mug cake is more than just a kitchen shortcut; it is a testament to the joy of simple, accessible baking. By stripping away the complexity of traditional recipes, we are left with a warm, comforting dessert that anyone can master in minutes. Whether you stick to a classic chocolate version or experiment with gourmet add-ins like sea salt, caramel, or fresh fruit, this recipe provides a reliable canvas for your culinary creativity.
The next time you find yourself longing for something sweet but short on time, remember that a delicious, steaming cake is sitting right in your pantry, disguised as a box of mix. It is efficient, cost-effective, and most importantly, incredibly satisfying. Give this method a try tonight—your taste buds (and your schedule) will thank you. If you enjoyed this recipe, feel free to leave a comment below with your favorite cake mix and topping combinations, and don’t forget to share this quick hack with your fellow dessert lovers!


