

Cream Cheese Recipe: Easy, Creamy & Homemade
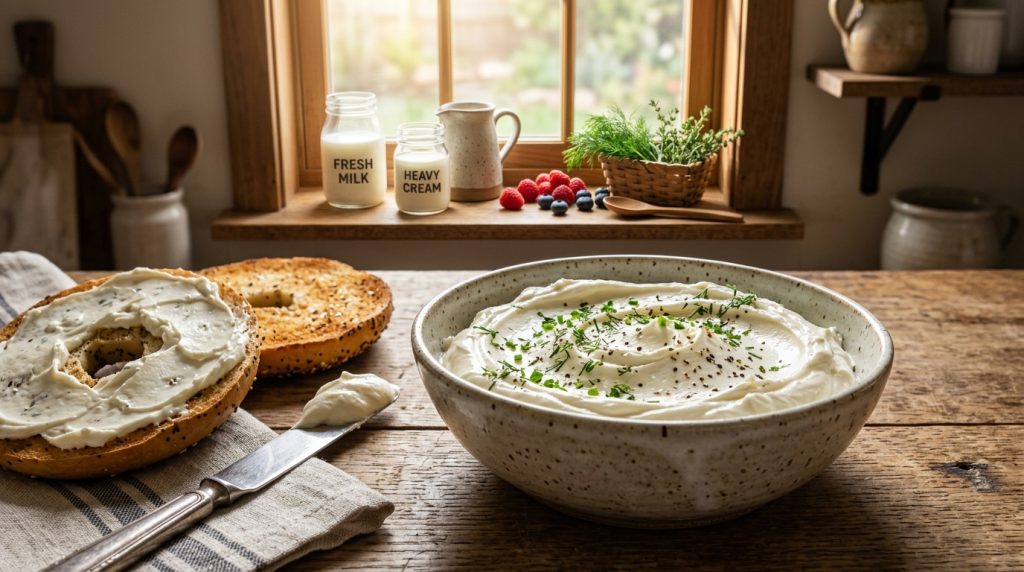
There is something profoundly satisfying about making your own staples from scratch. We often walk down the dairy aisle and grab a silver-wrapped block of cream cheese without a second thought, but once you taste a batch made in your own kitchen, the store-bought version feels like a distant second. Homemade cream cheese is remarkably rich, velvety, and possesses a clean, tangy brightness that commercial brands—often loaded with stabilizers like guar gum or xanthan gum—simply cannot replicate. Whether you are planning a Sunday brunch with fresh bagels or preparing a decadent cheesecake, this DIY method elevates your cooking to an artisanal level.
Making cream cheese at home is surprisingly simple. You don’t need fancy laboratory equipment or hard-to-find cultures. With just a carton of milk, some heavy cream, and a bit of lemon juice, you can transform liquid dairy into a thick, spreadable masterpiece. The process is a beautiful lesson in culinary chemistry: the acid denatures the milk proteins, causing them to clump together into soft curds, while the gentle heat ensures a smooth separation from the whey. In this guide, we will walk through every nuance of the process, from choosing the right dairy to mastering the final whip for that signature silky texture.
| Category | Details |
|---|---|
| Recipe Name | Artisanal Homemade Cream Cheese |
| Cuisine | American / International |
| Course | Breakfast / Spread / Ingredient |
| Prep Time | 15 Minutes |
| Cook Time | 10 Minutes |
| Total Time | 35 Minutes (plus straining time) |
| Servings | Approx. 1.5 cups (12 oz) |
| Calories | ~80 kcal per tablespoon |
| Difficulty Level | Easy |
Why You’ll Love This Recipe
- Pure Ingredients: You have total control over what goes into your food. This recipe is free from preservatives, artificial thickeners, and GMO stabilizers found in many commercial tubs.
- Superior Texture: By whipping the finished curds in a food processor, you achieve a level of creaminess that is both light and decadent, far surpassing the dense, rubbery texture of some store-bought brands.
- Cost-Effective: If you buy high-quality organic cream cheese, it can be expensive. Making it at home using standard milk and cream is often much more budget-friendly.
- Customizable Flavors: Once you have the base, you can swirl in honey, fold in fresh herbs, or add roasted garlic to create bespoke spreads that aren’t available in stores.
- The “Whey” Factor: You get a bonus ingredient! The leftover liquid (whey) is packed with protein and can be used in smoothies, bread making, or even as a probiotic boost for your garden.
- Culinary Satisfaction: There is a unique joy in serving guests a cheese you made yourself. It’s a great conversation starter and a rewarding kitchen project.
Ingredients
Ingredients You’ll Need
- 4 Cups Whole Milk: Use the freshest milk possible. Avoid “Ultra-Pasteurized” (UHT) milk if you can, as the high heat treatment can make it difficult for the proteins to bond properly.
- 2 Cups Heavy Cream: This provides the high fat content necessary for that luxurious “cream” cheese mouthfeel.
- 3 Tablespoons Fresh Lemon Juice: The acid catalyst. You can also use white distilled vinegar, but lemon juice adds a subtle, pleasant brightness.
- 1/2 Teaspoon Sea Salt: To enhance the natural sweetness of the dairy. Adjust to your taste.
Optional Add-Ins
- Fresh Chives: Finely minced for a classic savory spread.
- Honey and Walnut: For a sweet, crunchy breakfast option.
- Everything Bagel Seasoning: Swirled in at the end for maximum flavor.
- Smoked Paprika: For a subtle, earthy depth.
Ingredient Substitutions
- Vinegar for Lemon Juice: If you don’t have lemons, white vinegar works perfectly. Use the same 1:1 ratio. Avoid balsamic or apple cider vinegar as they will discolor the cheese.
- Half-and-Half: If you want a lower-fat version, you can replace the milk and cream with 6 cups of half-and-half, though the result will be slightly less rich.
- Citric Acid: 1/2 teaspoon of citric acid dissolved in a tablespoon of water can be used as a very consistent alternative to lemon juice.
Equipment Needed
- Large Heavy-Bottomed Pot: To prevent the milk from scorching on the bottom.
- Fine Mesh Strainer: To hold the cheesecloth.
- Cheesecloth: Or a clean, thin flour-sack kitchen towel.
- Instant-Read Thermometer: Helpful for ensuring the milk reaches the right temperature without boiling over.
- Food Processor or High-Speed Blender: This is the secret to getting that commercial-style smoothness.
- Silicone Spatula: For stirring and scraping the sides of the blender.
Step 1: Heat the Dairy
In your large pot, combine the 4 cups of whole milk and 2 cups of heavy cream. Place the pot over medium heat. You want to heat the mixture slowly, stirring occasionally with a silicone spatula to ensure the milk doesn’t stick to the bottom. Watch for the first signs of activity—small bubbles will begin to form around the edges, and steam will rise steadily. If you have a thermometer, aim for approximately 190°F (88°C). Do not let it come to a rolling boil, as this can result in a grainy texture.
Step 2: Add the Acid
Once the dairy is hot and frothy, reduce the heat to low. Pour in the 3 tablespoons of lemon juice (or vinegar) one tablespoon at a time, stirring gently after each addition. You will almost immediately see the magic happen. The milk will begin to curdle, separating into white clumps (the curds) and a translucent, yellowish liquid (the whey). Continue to stir very slowly for about 2 minutes to ensure the acid is fully distributed. Turn off the heat and let the pot sit undisturbed for 5 to 10 minutes. This resting period allows the curds to tighten and firm up.
Step 3: Strain the Curds
Line your fine-mesh strainer with two layers of cheesecloth and place it over a large bowl to catch the whey. Carefully pour the contents of the pot into the strainer. The golden whey will drain through, leaving the snowy white curds behind. Let the curds drain at room temperature for about 15 to 20 minutes. If you want a very thick, dry cream cheese (better for baking), you can let it drain for up to an hour, or even give the cheesecloth a gentle squeeze to remove excess moisture.
Step 4: The Transformation (Blending)
Transfer the warm curds into a food processor or blender. At this stage, the curds might look a bit like cottage cheese—chunky and slightly separated. Add the sea salt. Process the curds on high for 1 to 2 minutes. This is the most crucial step. The mechanical action of the blades breaks down the protein clumps and emulsifies the fat, turning the grainy curds into a perfectly smooth, glossy spread. Stop and scrape down the sides once or twice to ensure every bit is processed.
Step 5: Final Adjustments and Chilling
Taste your cream cheese. If it’s too thick, you can add back a teaspoon of the reserved whey and blend again. If it needs more salt, add it now. If you are adding herbs or flavorings, pulse them in gently at the very end. Transfer the cream cheese to a glass jar or airtight container. It will be slightly soft while warm but will firm up to the perfect spreadable consistency after chilling in the refrigerator for at least 2 hours.
Expert Cooking Tips
Temperature Control is Key
The most common mistake is boiling the milk. High heat can “scorch” the proteins, leading to a burnt flavor and a gritty texture that even a high-speed blender can’t fix. Slow and steady wins the race. Using a heavy-bottomed pot (like a Dutch oven) helps distribute heat evenly.
Don’t Toss the Whey
The liquid you strain off is nutritional gold. It contains riboflavin, vitamin B12, and high-quality protein. Use it to replace water in bread recipes for a softer crumb, or use it as the liquid base for your morning smoothie. It stays fresh in the fridge for up to a week.
The Blender Secret
If your cream cheese feels “sandy,” it usually means it wasn’t blended long enough. Don’t be afraid to let the food processor run. The friction will actually help slightly warm the fats, allowing them to create a more stable emulsion.
Quality of Dairy
Since there are so few ingredients, the quality of your milk and cream matters immensely. If you can find vat-pasteurized or local farm-fresh dairy, the flavor will be significantly more complex and creamy than standard supermarket options.
Common Mistakes To Avoid
- Using Ultra-Pasteurized Milk: UHT milk has been heated to such high temperatures that the proteins are often too damaged to form strong curds. Your result may be a thin, milky mess rather than solid curds.
- Stirring Too Vigorously: Once you add the acid, stir very gently. Aggressive stirring can break the curds into tiny fragments that are hard to strain and can result in a grainier cheese.
- Over-Draining: If you leave the curds to drain for too long (like overnight) without checking them, the cheese can become crumbly and dry like a farmer’s cheese. If this happens, you’ll need to add extra cream or whey during the blending process to bring back the moisture.
- Adding Salt Too Early: Always add the salt during the blending phase. Adding it to the boiling milk can sometimes interfere with the curdling process.
- Skipping the Chilling Phase: Homemade cream cheese needs time for the fats to re-solidify. If you eat it warm, it will taste more like a thick sauce than a spread. Patience in the fridge is rewarded with the perfect texture.
Health Benefits
Homemade cream cheese offers several nutritional advantages over its commercial counterparts. By making it yourself, you eliminate the industrial gums and thickeners that some people find difficult to digest.
- High-Quality Protein: It provides a concentrated source of casein and whey proteins, which are essential for muscle repair and metabolic function.
- Rich in Calcium: As a dairy-based product, it is an excellent source of calcium, vital for bone health and nerve signaling.
- Vitamin A: The healthy fats in the cream are rich in Vitamin A, which supports vision and immune health.
- No Additives: Many store-bought “light” versions use fillers to mimic texture. By using real cream, you get satiety from healthy fats without the need for chemical modifiers.
For those with specific dietary needs, this recipe is naturally Gluten-Free and Vegetarian. If you are looking for a Low-Carb/Keto option, this is perfect as it contains no added sugars or starches. For a High-Protein boost, you can blend in a little Greek yogurt during the final step.
Variations
Vegan Version
To make a plant-based alternative, soak 2 cups of raw cashews overnight. Blend them with 1/4 cup water, 2 tablespoons of lemon juice, 1 tablespoon of nutritional yeast, and a pinch of salt until completely smooth. This provides a similar tang and creaminess without the dairy.
Spicy Version
Fold in finely diced jalapeños and a teaspoon of crushed red pepper flakes after the blending process. This is incredible on a toasted “Everything” bagel or as a base for a spicy crab dip.
Smoky Version
Add a drop of liquid smoke or a teaspoon of smoked sea salt during the blending phase. This pairs beautifully with smoked salmon or roasted vegetables.
Sweet Berry Version
Macerate 1/2 cup of strawberries or blueberries with a teaspoon of sugar, then swirl the fruit compote into the finished, chilled cream cheese for a gourmet breakfast spread.
Garlic and Herb Version
This is the most popular variation. Add 1 clove of roasted garlic and 2 tablespoons of mixed fresh herbs (parsley, dill, and chives) to the food processor during the final whip.
What To Serve With Homemade Cream Cheese
Side Dishes & Snacks
Beyond the classic bagel, try spreading this on toasted sourdough or using it as a dip for crisp cucumber slices and celery sticks. It also makes an excellent topping for baked potatoes when mixed with a little extra chive.
Sauces
You can use this homemade cheese as a base for a quick Alfredo-style pasta sauce. Simply melt it into a pan with a little pasta water and parmesan cheese for an instant, creamy dinner.
Desserts
This is the ultimate base for a “No-Bake” cheesecake. Because it lacks the stabilizers of commercial blocks, it creates a much softer, mousse-like dessert that melts in the mouth.
Holiday Pairings
During the holidays, serve a bowl of this cream cheese topped with pepper jelly or cranberry sauce as an easy but elegant appetizer for guests.
Storage Instructions
Refrigerator Storage
Since this recipe contains no preservatives, it should be kept in an airtight container in the coldest part of your refrigerator. It will stay fresh for about 5 to 7 days. Always use a clean knife to scoop it out to prevent cross-contamination.
Freezer Storage
Freezing cream cheese is generally not recommended if you plan to use it as a spread. The freezing process breaks the emulsion, resulting in a grainy, watery texture once thawed. However, if you plan to use it for baking (like in a pound cake or cooked sauce), it can be frozen for up to 2 months.
Reheating Instructions
If you are using the cream cheese in a sauce, melt it slowly over low heat. If it looks like it’s breaking, whisk in a splash of milk or cream to help re-emulsify the fats.
Meal Prep Tips
If you are meal prepping for the week, portion the cream cheese into small 2-ounce containers. This makes it easy to grab for work lunches and keeps the main batch fresher for longer by reducing exposure to air.
Nutritional Information
| Nutrient | Amount per 2 Tbsp (28g) |
|---|---|
| Calories | 95 kcal |
| Total Fat | 9g |
| Saturated Fat | 6g |
| Cholesterol | 30mg |
| Sodium | 95mg |
| Total Carbohydrates | 1.5g |
| Sugars | 1g |
| Protein | 2g |
Nutrition values are estimates and may vary depending on the specific brands and fat percentages of the milk and cream used.
FAQs
What can I do with my cream cheese if it’s too runny?
If your cream cheese hasn’t firmed up enough after chilling, it likely has too much residual whey. You can place it back in a cheesecloth-lined strainer and let it drain in the fridge for another hour. Alternatively, you can blend in a small amount of softened butter to help it set firmer.
How to make perfect cream cheese at home without a food processor?
If you don’t have a food processor, you can use a high-speed blender. If you have neither, you will need to use a fine-mesh sieve and a spoon to “push” the curds through the mesh several times. This is labor-intensive but will eventually break down the curds into a smooth paste.
What are the ingredients of cream cheese in a professional setting?
Professional or commercial cream cheese is usually made by adding lactic acid bacteria to a mixture of milk and cream. This acidifies the dairy over many hours. In our home version, we use lemon juice to achieve the same acidification instantly. Commercial versions also often add “locust bean gum” to keep the water and fat from separating.
How to make cream cheese with no cream cheese on hand?
This recipe is exactly how you do that! By using basic milk and cream, you can create a substitute that is often better than the original. If you are in a rush and need a “no-cook” substitute, blending cottage cheese with a little lemon juice and butter can work in a pinch for certain recipes.
Can I use skim milk for this recipe?
You can, but I wouldn’t recommend it. Cream cheese relies on fat for its structure and flavor. Using skim milk will result in a very small yield of rubbery curds that lack the characteristic “melting” quality of real cream cheese.
Why did my milk not curdle?
This usually happens for two reasons: either the milk wasn’t hot enough (it needs to be near 190°F) or you didn’t add enough acid. Try adding another tablespoon of lemon juice and stirring gently over low heat; the curds should form almost instantly.
Recipe Summary
| Feature | Quick Info |
|---|---|
| Prep Time | 15 Mins |
| Cook Time | 10 Mins |
| Total Time | 35 Mins (+ 2 hrs chill) |
| Servings | 12 oz |
| Main Flavor Notes | Creamy, Tangy, Fresh, Milky |
| Best Occasions | Breakfast, Brunch, Baking, Appetizers |
Conclusion
Mastering the art of homemade cream cheese is a game-changer for any home cook. It moves you away from processed, additive-filled containers and toward a fresher, more vibrant culinary experience. The process is meditative—watching the milk transform into delicate curds is a reminder of the simple beauty of cooking from scratch. This recipe yields a spread that is incredibly versatile, working just as well in a savory dip as it does in a sweet frosting.
The next time you’re at the store, skip the dairy aisle and head straight for the fresh milk and cream. With just a few minutes at the stove and a quick whirl in the blender, you’ll have a bowl of white, velvety gold that will make your morning bagel feel like a five-star meal. We encourage you to experiment with the variations mentioned above—perhaps a honey-cinnamon blend for the kids or a sharp chive version for your next party. If you try this recipe, please leave a comment below and let us know how it turned out! Sharing your kitchen successes with friends and family is the best part of being a home chef. Happy cheesemaking!
Related:
No Bake Chocolate Cheesecake – Easy & Creamy Recipe
Fudgy Chocolate Brownies with Nuts Recipe
Deviled Strawberries Recipe – Easy & Creamy Dessert


