

Easter Brownies with Bunny Pawprints – Easy & Cute Recipe
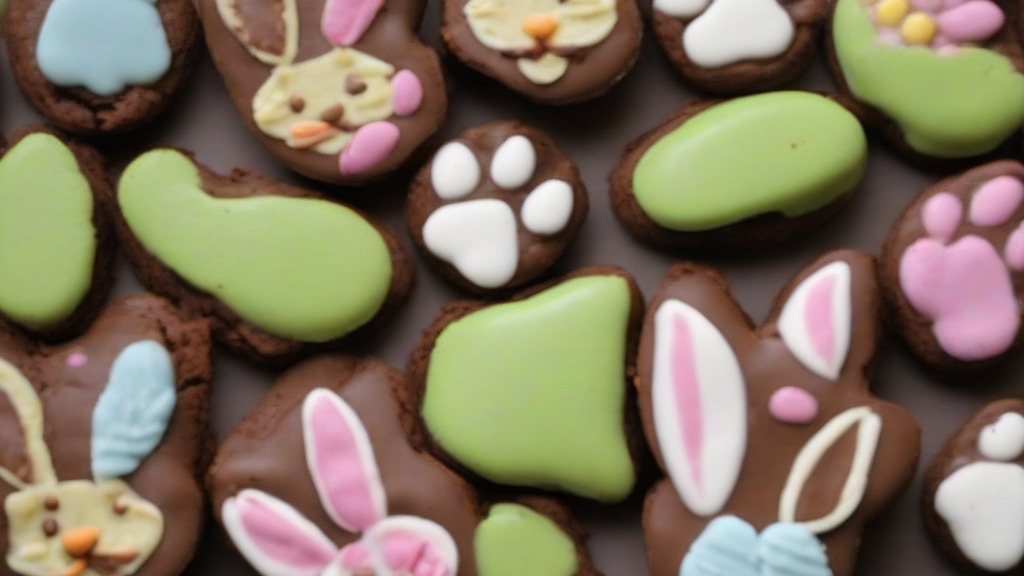
Creating festive holiday treats is a wonderful way to bring family together in the kitchen, especially during the spring season. These decadent, fudgy squares provide the perfect canvas for creative decorating, transforming a standard dessert into a whimsical centerpiece. By adding simple, hand-crafted details using melted chocolate and candies, you can easily create easter brownies with bunny pawprints that delight children and adults alike.
This recipe balances the rich, intense flavor of dark cocoa with the playful aesthetic of seasonal baking. You will find that the dense texture of the brownie holds up perfectly to the decorative toppings, ensuring your finished product looks as professional as it tastes. Whether you are preparing these for a school party or a family brunch, the process is straightforward and yields impressive, reliable results every time.
- Prep time: 15 minutes
- Cook time: 30 minutes
- Total time: 45 minutes
- Servings: 12
- Calories: 380 per serving
Why You’ll Love This Recipe

- The texture is exceptionally fudgy and moist, avoiding the dry, cake-like consistency of lesser recipes.
- You can prepare the brownies in advance, leaving only the decoration for the day of your event.
- The visual appeal of the bunny designs makes this a standout dessert for Easter gatherings.
- It uses standard pantry staples, meaning you likely have most of the ingredients on hand already.
- The portion size is perfect for sharing, as the rich chocolate flavor pairs well with a smaller square.
Ingredients
- 1 cup unsalted butter, melted
- 2 cups granulated sugar
- 4 large eggs, room temperature
- 2 teaspoons vanilla extract
- 1 cup all-purpose flour
- 1 cup unsweetened cocoa powder
- 1/2 teaspoon salt
- 1/2 cup semi-sweet chocolate chips
- 1/2 cup white chocolate melting wafers (for the pawprints)
- 36 pink M&M candies or mini marshmallows (for the paw pads)
Equipment Needed
- 9×13 inch baking pan
- Parchment paper
- Large mixing bowl
- Whisk or electric hand mixer
- Silicone spatula
- Small piping bag or plastic sandwich bag
- Wire cooling rack
How To Make
- Preheat your oven to 350°F (175°C) and line your 9×13 inch baking pan with parchment paper, leaving an overhang on the sides for easy removal.
- In a large bowl, whisk together the melted butter and sugar until the mixture is smooth and slightly pale.
- Add the eggs one at a time, whisking thoroughly after each addition, then stir in the vanilla extract.
- Sift the flour, cocoa powder, and salt into the wet ingredients and fold gently with a spatula until just combined; do not overmix.
- Fold in the semi-sweet chocolate chips and pour the batter into the prepared pan, spreading it evenly to the corners.
- Bake for 25 to 30 minutes, or until a toothpick inserted into the center comes out with a few moist crumbs attached rather than raw batter.
- Remove from the oven and let the brownies cool completely in the pan on a wire rack before attempting to slice or decorate.
- Once cool, lift the brownies out using the parchment paper and cut them into 12 even rectangles.
- Melt the white chocolate wafers in the microwave in 20-second bursts, stirring between each, until smooth.
- Transfer the melted white chocolate into a piping bag, snip a tiny corner, and pipe one large “pad” and three smaller “toes” onto each brownie to form the pawprint.
- Immediately press the pink candies or marshmallows into the wet white chocolate before it sets.
Expert Cooking Tips
- To ensure your pawprints look sharp, wait until the brownies are fully chilled before piping, as heat from the brownie can cause the white chocolate to spread.
- If you prefer a more intense chocolate profile, swap half of the semi-sweet chips for dark chocolate chunks.
- You can store these at room temperature in an airtight container for up to three days, or freeze them for up to one month without the decorations.
- If the white chocolate becomes too thick while decorating, place the piping bag in a bowl of warm water for a minute to soften it.
- Avoid overbaking the brownies; they will continue to set as they cool, and pulling them early ensures that signature fudgy texture.
Frequently Asked Questions
Can I use milk chocolate for the pawprints?
Yes, but white chocolate provides a better contrast against the dark brownie surface. If you use milk chocolate, consider using a lighter-colored candy or frosting to make the paw design stand out clearly.
What if I don’t have pink candies for the toes?
You can easily dye a small amount of white chocolate with a drop of gel food coloring, or simply use mini marshmallows cut in half. The texture of the marshmallow adds a nice contrast to the firm chocolate.
How do I get clean edges when cutting the brownies?
For the cleanest cuts, chill the brownies in the refrigerator for at least an hour before slicing. Use a sharp, hot knife and wipe the blade clean between every cut for professional-looking edges.
Can I make these gluten-free?
You can substitute the all-purpose flour with a high-quality 1-to-1 gluten-free baking blend. Ensure your cocoa powder and chocolate chips are also certified gluten-free to maintain safety for those with celiac disease.
Conclusion
Preparing these treats is a rewarding way to welcome the holiday season. The combination of deep, rich chocolate and the charming, hand-piped details creates a dessert that is as fun to look at as it is to eat. By following the cooling and piping instructions, you will ensure that your decorations remain crisp and perfectly placed until it is time to serve.
You may find that experimenting with different candy colors or even adding a hint of peppermint extract to the batter opens up new possibilities for your future batches. Once you master the technique for these easter brownies with bunny pawprints, you will likely find yourself returning to this recipe every spring. Please share your own photos or favorite variations in the comments, as we love seeing how these creative designs turn out in your home kitchen.
Easter Brownies with Bunny Pawprints Recipe
Ingredients
Equipment
Method
- Preheat your oven to 350°F (175°C) and line your 9×13 inch baking pan with parchment paper, leaving an overhang on the sides for easy removal.
- In a large bowl, whisk together the melted butter and sugar until the mixture is smooth and slightly pale.
- Add the eggs one at a time, whisking thoroughly after each addition, then stir in the vanilla extract.
- Sift the flour, cocoa powder, and salt into the wet ingredients and fold gently with a spatula until just combined; do not overmix.
- Fold in the semi-sweet chocolate chips and pour the batter into the prepared pan, spreading it evenly to the corners.
- Bake for 25 to 30 minutes, or until a toothpick inserted into the center comes out with a few moist crumbs attached rather than raw batter.
- Remove from the oven and let the brownies cool completely in the pan on a wire rack before attempting to slice or decorate.
- Once cool, lift the brownies out using the parchment paper and cut them into 12 even rectangles.
- Melt the white chocolate wafers in the microwave in 20-second bursts, stirring between each, until smooth.
- Transfer the melted white chocolate into a piping bag, snip a tiny corner, and pipe one large “pad” and three smaller “toes” onto each brownie to form the pawprint.
- Immediately press the pink candies or marshmallows into the wet white chocolate before it sets.


