Roasted Garlic and Fresh Rosemary Focaccia Recipe
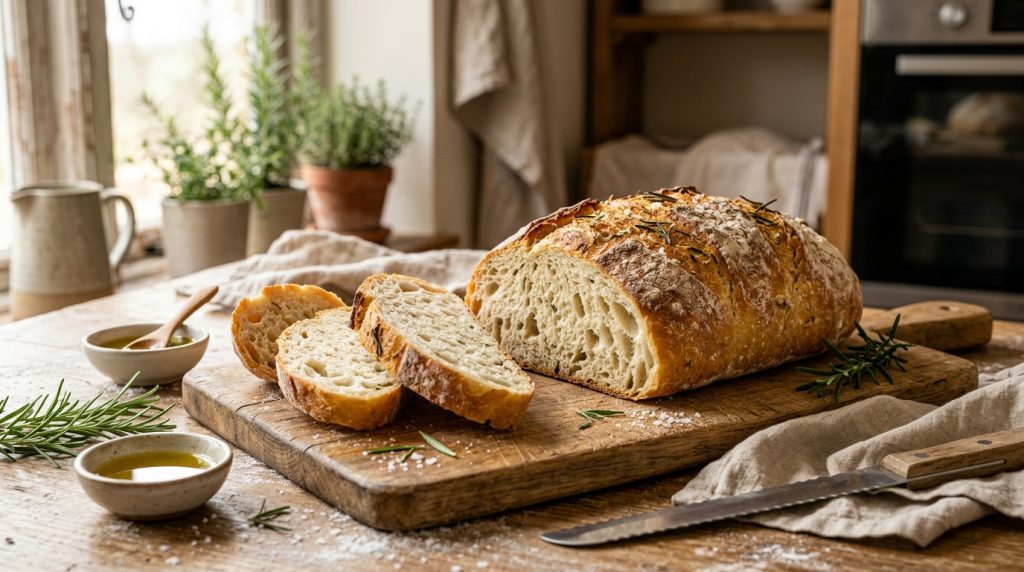
There is something undeniably primal and comforting about the scent of fresh bread baking in a home kitchen. When you infuse that dough with the woody, pine-like aroma of fresh rosemary and the mellow, caramelized sweetness of roasted garlic, the result is nothing short of transformative. This roasted garlic and fresh rosemary focaccia is designed to be the centerpiece of your table, offering a golden, shatteringly crisp exterior and a pillowy, airy crumb that practically begs to be dipped into high-quality olive oil. Whether you are a seasoned baker or a novice taking your first steps into the world of yeast and flour, this recipe provides a foolproof path to artisanal success.
Focaccia is the perfect “entry-level” bread because it requires no complex shaping or delicate scoring. It is a rustic, dimpled canvas that celebrates the quality of its ingredients. In this version, we focus on the synergy between the aromatic herb and the buttery garlic cloves, creating a flavor profile that is both sophisticated and deeply nostalgic. It’s the ideal accompaniment to a summer pasta dish, a hearty winter stew, or simply enjoyed on its own as a midday snack. As we walk through the process, you’ll learn the science of hydration, the importance of cold fermentation, and the sensory cues that signal a perfectly baked loaf.
| Feature | Details |
|---|---|
| Recipe Name | Roasted Garlic and Fresh Rosemary Focaccia |
| Cuisine | Italian / Mediterranean |
| Course | Appetizer / Side Dish / Bread |
| Prep Time | 20 Minutes (plus rising time) |
| Cook Time | 25 Minutes |
| Total Time | 3 Hours (minimum) to 24 Hours (optimal) |
| Servings | 10–12 Portions |
| Calories | 210 kcal per serving |
| Difficulty Level | Intermediate-Beginner |
Why You’ll Love This Recipe
- Incredible Texture Contrast: The high olive oil content ensures a bottom that is essentially “fried” in the pan, creating a crunch that contrasts beautifully with the soft, honeycomb interior.
- No-Knead Simplicity: You don’t need a stand mixer or powerful forearms. Time and hydration do the heavy lifting, developing the gluten structure naturally.
- Aromatic Excellence: The combination of fresh rosemary and roasted garlic creates a sensory experience that fills your entire home with a bakery-quality fragrance.
- Versatile Pairing: This bread is equally at home next to a bowl of tomato soup, sliced for gourmet sandwiches, or served on a charcuterie board with cured meats and cheeses.
- Make-Ahead Friendly: The dough thrives on a long, slow rise in the refrigerator, meaning you can prep it a day in advance and bake it fresh when you’re ready to serve.
- Crowd Pleaser: It’s naturally vegan (if using oil instead of butter) and can be easily adapted to suit various dietary preferences without losing its soul.
Ingredients
Ingredients You’ll Need
- Bread Flour (500g / approx. 4 cups): Bread flour has a higher protein content than all-purpose flour, which is crucial for creating those large, airy bubbles (alveoli).
- Warm Water (400ml): Aim for roughly 105°F to 110°F. If the water is too hot, it will kill the yeast; too cold, and it won’t activate.
- Active Dry Yeast (2 ¼ tsp / 1 standard packet): This provides the lift and the classic fermented flavor.
- Honey or Sugar (1 tsp): A small amount of sugar feeds the yeast, helping it kickstart the fermentation process.
- Fine Sea Salt (2 tsp): Essential for tightening the gluten and bringing out the flavor of the wheat.
- Extra Virgin Olive Oil (½ cup, divided): Use the best quality you can find. It’s a primary flavor component, not just a cooking fat.
- Fresh Rosemary (3-4 sprigs): Stripped from the stem and roughly chopped. Fresh is significantly better than dried for this application.
- Garlic (1 whole head): We will roast this to create sweet, spreadable cloves.
- Flaky Sea Salt (for finishing): Such as Maldon, to provide a burst of salinity and crunch on the crust.
Optional Add-Ins
- Sun-dried Tomatoes: Finely chopped and pressed into the dimples for a tart, concentrated tomato flavor.
- Kalamata Olives: Pitted and halved olives add a salty, Mediterranean punch.
- Caramelized Onions: Thinly sliced onions cooked down until jammy provide a lovely sweetness.
- Parmesan Cheese: A light dusting of freshly grated Parmigiano-Reggiano creates a savory, umami crust.
- Red Pepper Flakes: For those who enjoy a subtle back-end heat.
Ingredient Substitutions
- Flour: If you don’t have bread flour, all-purpose flour will work, but the texture will be slightly softer and less chewy.
- Yeast: You can use Instant Yeast instead of Active Dry. If using Instant, you can skip the blooming step and mix it directly with the dry ingredients.
- Sweetener: Maple syrup or agave can replace honey if you want to keep the recipe strictly vegan.
- Herbs: While rosemary is the star here, fresh thyme or oregano are excellent alternatives if rosemary isn’t available.
Equipment Needed
- Large Mixing Bowl: To allow the dough plenty of room to double or triple in size.
- 9×13 Inch Baking Pan: A metal pan is preferred for a crispier bottom, but a ceramic dish also works.
- Plastic Wrap or a Damp Kitchen Towel: To cover the dough during the proofing stages.
- Aluminum Foil: For roasting the garlic.
- Kitchen Scale: For the most accurate results, though cup measurements are provided.
- Dough Scraper (Optional): Useful for handling the high-hydration, sticky dough.
How To Make Roasted Garlic and Fresh Rosemary Focaccia
Step 1: Roast the Garlic
Preheat your oven to 400°F (200°C). Slice the top off the head of garlic to expose the individual cloves. Place the head on a small piece of aluminum foil, drizzle with a teaspoon of olive oil, and sprinkle with a pinch of salt. Wrap the foil tightly and roast for 35–40 minutes until the cloves are soft and golden brown. Once cool, squeeze the cloves out of their skins into a small bowl and set aside. This can be done a day in advance.
Step 2: Bloom the Yeast
In your large mixing bowl, combine the warm water, honey, and active dry yeast. Give it a gentle stir and let it sit for about 5–10 minutes. You are looking for a foamy, bubbly head to form on the surface. This “bloom” indicates that your yeast is alive and ready to work. If it doesn’t foam, your yeast may be expired or the water was the wrong temperature.
Step 3: Mix the Dough
Add 2 tablespoons of olive oil and the fine sea salt to the yeast mixture. Gradually add the bread flour. Use a sturdy spoon or your hands to mix until a shaggy, sticky dough forms and no dry flour streaks remain. The dough will be very wet—this is intentional! High hydration is the secret to those big air pockets. Cover the bowl with plastic wrap and let it rest for 30 minutes. This rest period, known as autolyse, allows the flour to fully hydrate and makes the dough easier to handle.
Step 4: The “Stretch and Fold”
Instead of traditional kneading, we will use the stretch and fold method. Wet your hands to prevent sticking. Reach under one side of the dough, pull it up, and fold it over the center. Rotate the bowl and repeat this 4 times. This gently builds gluten strength without degassing the dough. Cover and let rise in a warm, draft-free spot for 1.5 to 2 hours, or until doubled in size. Pro Tip: For the best flavor, place the covered bowl in the fridge for 12–24 hours for a cold ferment.
Step 5: Transfer and Second Proof
Pour about 3 tablespoons of olive oil into your 9×13 baking pan, ensuring the bottom and sides are well-coated. Gently transfer the dough into the pan. Do not force it to the corners yet. Flip the dough once so it’s coated in oil. Let it rest, uncovered, for another 45–60 minutes. During this time, the dough will naturally relax and spread toward the edges of the pan.
Step 6: Dimpling and Topping
Preheat your oven to 425°F (220°C). Now comes the most satisfying part. Grease your fingers with olive oil. Press your fingertips straight down into the dough to create deep dimples all over the surface. You should see bubbles rising and “popping” under the surface. Distribute the roasted garlic cloves and chopped fresh rosemary into the dimples. Drizzle the remaining olive oil over the top and sprinkle generously with flaky sea salt.
Step 7: Baking to Perfection
Place the pan on the middle rack of the oven. Bake for 20–25 minutes. Watch for the crust to turn a deep, golden brown and the edges to pull away slightly from the pan. The aroma of toasted rosemary and garlic should be intense. If you have a digital thermometer, the internal temperature should reach about 200°F (93°C).
Step 8: Cooling
Remove the pan from the oven. Let the focaccia sit in the pan for 5 minutes to reabsorb any excess oil, then carefully transfer it to a wire cooling rack. This prevents the bottom from becoming soggy. Wait at least 15 minutes before slicing—if you can resist!
Expert Cooking Tips
- Temperature Matters: If your kitchen is cold, your dough will take much longer to rise. You can create a “proof box” by placing the bowl in an oven that is turned off but has the oven light on.
- Don’t Scrimp on Oil: Focaccia is essentially a deep-fried bread. The olive oil is what creates the golden crust and prevents the bread from sticking. If the pan looks dry, add more oil.
- Fresh vs. Dried Herbs: Fresh rosemary contains oils that stand up well to the high heat of the oven. Dried rosemary can sometimes become “woody” or sharp when baked. If you must use dried, soak it in a little olive oil first to rehydrate it.
- The Windowpane Test: To check gluten development, take a small piece of dough and stretch it. If it stretches thin enough to see light through it without tearing, the gluten is well-developed.
- High Quality Salt: Using a coarse or flaky salt for the topping makes a massive difference. It provides little “pops” of flavor that balance the richness of the oil.
Common Mistakes To Avoid
- Using Cold Water: Yeast is a living organism. Using water straight from the fridge will keep the yeast dormant, and your bread won’t rise.
- Over-Flouring the Dough: It is tempting to add more flour because the dough is sticky. Resist! A sticky dough leads to a light, airy focaccia. A dry dough leads to a dense, heavy loaf.
- Under-Proofing: If you don’t let the dough rise sufficiently in the pan before dimpling, the bread will be tough rather than fluffy. Wait until it looks jiggly and full of air.
- Not Dimpling Deep Enough: You want your fingers to almost touch the bottom of the pan. This creates the “valleys” where the oil and herbs can pool.
- Slicing Too Early: Cutting into hot bread allows steam to escape, which can make the remaining bread gummy. Patience results in a better crumb.
Health Benefits
While focaccia is a carbohydrate-rich food, it offers several nutritional benefits when made with high-quality ingredients. Rosemary is rich in antioxidants and anti-inflammatory compounds, which are known to boost the immune system and improve blood circulation. Garlic is a powerhouse of Allicin, which has been linked to heart health and lower cholesterol levels.
By using extra virgin olive oil, you are incorporating healthy monounsaturated fats into your diet, which are essential for brain health and reducing inflammation. If you choose to use a portion of whole wheat flour, you can also increase the fiber content, aiding in digestion and providing a slower release of energy. This recipe is naturally vegan and dairy-free, making it an inclusive option for many dietary needs.
Variations
Vegan Version
This recipe is already vegan! Just ensure your sweetener is sugar or maple syrup instead of honey. Avoid topping with cheese.
Gluten-Free Version
Use a high-quality 1-to-1 gluten-free baking flour. Note that GF dough won’t “stretch” like traditional dough, so you will need to spread it into the pan with a spatula and skip the stretch-and-fold steps.
Low-Carb Version
While traditional focaccia is high-carb, you can make a “focaccia-style” bread using almond flour, eggs, and mozzarella cheese (often called “Fathead dough”). The texture will be different, but the rosemary and garlic toppings remain the same.
Spicy Version
Add sliced fresh jalapeños and a teaspoon of crushed red pepper flakes to the dough during the mixing stage for a zesty kick.
Sweet Version
Omit the garlic and rosemary. Top with sliced grapes, a drizzle of honey, and a sprinkle of sugar for a traditional “Schiacciata con l’uva” style dessert bread.
What To Serve With Rosemary Focaccia
Side Dishes
- Roasted Tomato Soup: The classic pairing. The bread is perfect for mopping up the creamy soup.
- Arugula Salad: A peppery salad with lemon vinaigrette cuts through the richness of the olive oil.
- Grilled Vegetables: Zucchini, bell peppers, and eggplant seasoned with balsamic vinegar.
Sauces
- Balsamic and Oil: A small bowl of aged balsamic vinegar swirled into extra virgin olive oil.
- Whipped Feta: A creamy, salty dip that complements the herbal notes of the rosemary.
- Marinara: A simple, slow-cooked tomato sauce for dipping.
Drinks
- Dry White Wine: A Pinot Grigio or Sauvignon Blanc pairs beautifully with the herbal notes.
- Sparkling Water: With a squeeze of lemon to cleanse the palate.
- Iced Herbal Tea: Particularly mint or hibiscus.
Storage Instructions
Refrigerator Storage
Focaccia is best eaten the day it is made. However, you can store leftovers in an airtight container in the refrigerator for up to 3 days. Note that the crust will lose its crispness in the fridge.
Freezer Storage
This bread freezes exceptionally well. Wrap individual slices or the whole loaf tightly in plastic wrap, then place in a freezer-safe bag. It will stay fresh for up to 2 months. Thaw at room temperature before reheating.
Reheating Instructions
To restore the “just baked” crunch, reheat slices in a 350°F (175°C) oven or toaster oven for 5–8 minutes. Avoid the microwave, as it will make the bread rubbery.
Meal Prep Tips
You can make the dough through Step 3 and keep it in the refrigerator for up to 48 hours. This slow fermentation actually improves the flavor and makes the bread more digestible. Simply take it out, proceed with Step 5, and allow extra time for the dough to come to room temperature and rise.
Nutritional Information
| Nutrient | Amount Per Serving |
|---|---|
| Calories | 210 kcal |
| Protein | 5g |
| Carbohydrates | 28g |
| Fat | 9g |
| Fiber | 1.5g |
Nutrition values are estimates and may vary depending on ingredients used.
FAQs
What are some common rosemary bread mistakes?
The most common mistake is using too much flour, which makes the bread dense. Another frequent error is not allowing the dough to rise long enough; focaccia needs that time to develop its signature airy bubbles. Lastly, using old, dried rosemary can lead to a “pine needle” texture that isn’t pleasant to eat.
Does rosemary taste good in bread?
Absolutely. Rosemary is one of the most popular herbs for savory breads because its flavor is robust enough to stand up to the fermentation of the yeast and the high heat of the oven. It pairs perfectly with the neutral, nutty flavor of the wheat.
Is it better to use fresh or dried rosemary for bread?
Fresh is almost always better. Fresh rosemary has a softer texture and a more complex, citrusy-pine aroma. Dried rosemary can be very hard and may not soften sufficiently during the relatively short baking time of focaccia.
Can I use a bread machine for this recipe?
Yes, you can use the “dough” setting on your bread machine to handle the mixing and first rise. Once the cycle is complete, transfer the dough to your oiled baking pan and follow the instructions for the second proof and dimpling.
How do I get a really crispy bottom on my focaccia?
The secret is two-fold: use a metal baking pan (which conducts heat better than glass) and don’t be afraid of the olive oil. The oil essentially fries the bottom of the dough as it bakes. For an even crispier result, place your baking pan on a preheated pizza stone.
Why is my focaccia flat?
If your bread didn’t rise, your yeast might have been dead, or your water might have been too hot. It could also be that you over-dimpled the dough and popped all the air bubbles right before putting it in the oven. Be gentle during the dimpling stage!
Recipe Summary
| Category | Quick Info |
|---|---|
| Prep Time | 20 Minutes |
| Cook Time | 25 Minutes |
| Total Time | 3+ Hours |
| Servings | 12 |
| Main Flavor Notes | Herbal Rosemary, Sweet Roasted Garlic, Salty Crust |
| Best Occasions | Dinner Parties, Sunday Brunch, Holiday Sides |
Conclusion
Mastering the art of roasted garlic and fresh rosemary focaccia is a rewarding journey that culminates in a loaf of bread that is as beautiful to look at as it is to eat. The combination of simple pantry staples—flour, water, yeast, and oil—transformed by time and heat, results in a culinary masterpiece. This recipe highlights the importance of patience, allowing the dough to develop flavor and structure naturally. The addition of roasted garlic provides a depth of flavor that elevates the bread from a simple side dish to a gourmet experience.
Whether you’re serving this at a festive holiday gathering or enjoying a warm slice on a quiet weeknight, the feedback is always the same: pure delight. The versatility of focaccia means you can experiment with different toppings, but the classic rosemary and garlic pairing remains a timeless favorite for a reason. We encourage you to roll up your sleeves, embrace the sticky dough, and experience the joy of home-baked bread. If you try this recipe, please leave a comment below and share your results with friends and family. Happy baking!